
Configuring a Static IP address using Netplan
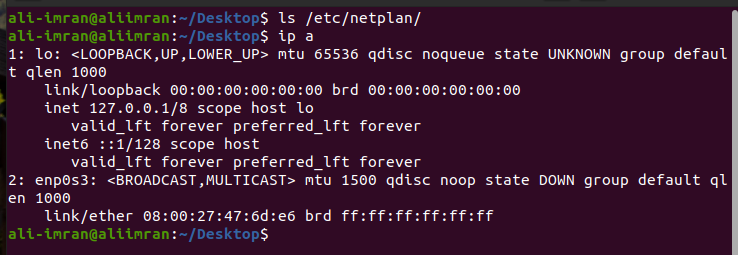
The configuration file for Netplan(.yaml) is stored in the directory ‘/etc/netplan’. In our case, there is no config file in this directory, and no IP is assigned to the interface ‘enp0s3’:
1. Setting a Single Static IP
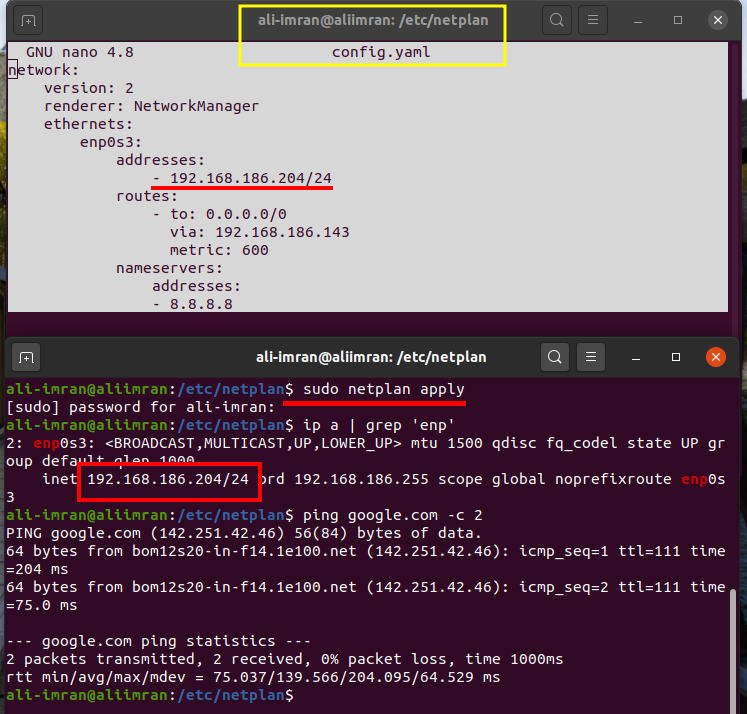
For setting a single static IP for a system using Netplan, create a new configuration file as ‘/etc/netplan/config.yaml’. Let us modify the interface enp0s3 with the following details:
Gateway: default
subnet prefix: /24
Now create or open the configuration file in the directory ‘/etc/netplan/’ with the command:
To apply the configuration, use the command:
Now check the IP with the ‘ip’ command:
Wrapping Up
In this guide, we have learned to set static IP using Netplan. Netplan config file is very space-sensitive as it uses the YAML format. Managing networking with Netplan is quite straightforward. You will not find it tough to master once you get used to it.
