
There are many reasons why you would want to migrate your website to another provider. Your current web host might not be offering you all of the services that you need, or you might be paying more than you should. Whatever the reason, there are plenty of ways you can prepare for the big move without affecting the website experience of your users and clients.
Moving your website can be stressful, especially if you cannot afford to be offline for a certain period of time. The biggest delay is normally getting your website’s DNS registration migrated over to your new provider, which can take a while, depending on when you begin the process. We’ll cover this in greater detail, but timing is something definitely worth keeping in mind.
With this article, we will help you prepare for migration, as well discuss as all the steps you should follow. You can use our step-by-step guide as a basis for moving your site, and then build your plan around it. Not all of the steps may apply to you, so use what you need and leave out the rest.
Combined with the need to transfer website files, restore important databases, and getting every software installation and subdomain configuration in working order, it can take up to a day of inactivity before your site is fully functioning again. There are, however, some pretty great tricks to avoid disaster when transferring a website to a new host server.
These tips are relatively easy to implement as long as the site’s administrator has a general understanding of cPanel, IP addresses, and more advanced FTP login routines that will enable them to work on a new web hosting plan configuration before DNS is altered and transferred to the new host.
At the end of the day, if the average customer is completely unaware of any changes being made behind the scenes, then the mission is a success! So let’s take a look at how we can smoothly execute this process!
1. Move First, Cancel Later
Do not cancel an existing web hosting plan before the move is complete.
The most common mistake made by website administrators who are new to web hosting, or new to transferring their websites between servers, is that they almost immediately contact their old host to inform them of their decision to move their services to a new company’s servers.
While it’s certainly a good idea to inform your old web host in a timely manner about future changes, doing so before the transition has been expertly executed can result in not just downtime, but a complete loss of files and database information from the moment a cancellation is requested.

Hold That Call
Web hosting companies generally cancel the customer’s plan almost immediately—as in, as soon as the call has ended—without waiting for the expiry of the current month’s service or subscription fee. Companies consider this as having the consumer’s best interest at heart, as they receive an immediate and prorated refund of any remaining fees.
However, it means that the company will virtually trash every shred of information that has been uploaded to the server during the customer’s time with them. There will be no opportunity, in many cases, to retrieve these files, and move them to the new web hosting company’s server or shared hosting plan in time.
This is the type of downtime that is extremely hard to recover from, as it potentially means a loss of all content and subscriber data, as well as commercial losses and customer payment details for some websites.
What To Do
Once a new hosting plan has been secured, transfer all files before canceling the existing hosting plan held by the old company. It might be a good idea to allow the website to run on the new company’s servers for a few days just to ensure that nothing has been overlooked during the move.
Once everything has been verified as properly transitioned, only then should the old hosting plan be canceled.
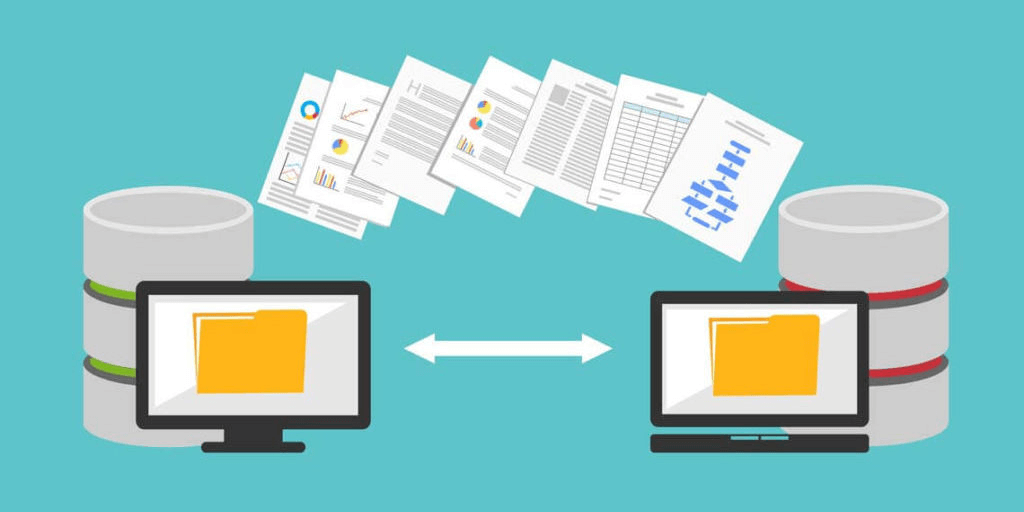
2. Download Backup Files
Login to cPanel and obtain compressed backups of website files and database information.
For pure ease of use, customers moving to a new web host should ensure that both the new and old hosting companies employ the same web-based administration technology. Typically, this will be a choice between cPanel and the slightly less-popular PleskPanel website control panel.
Aligning the technology employed by both hosts is the easiest way to ensure that data can be quickly backed up and restored in just as quick a fashion. For the cPanel control panel option, which is virtually the standard in web hosting, customers should navigate to their domain with the 2082 port number attached.
As a reference, it looks like this in a web browser’s address bar: http://my-site.com:2082. Alternatively, http://my-site.com/cpanel may work for some websites.
Locate the Backup Page
After successfully logging into the cPanel interface, locate a group of settings and control panel pages labeled “Backup.” This contains tools to back up the site’s main “public_html” folder, as well as any subdomains. Additionally, the tools here will assist web hosting customers in the backup of their MySQL databases for restoration to the new server.
Find the “Download Backups” option within this grouping, and click on the relevant cPanel administration page.

Downloading Backups
On this page, cPanel will break down the available backups by type. If a full-site backup is available, you should download that file so that it can later be uploaded to a different host. There will also be backup files specific to every subdomain within the website. These are generally optional since the full website backup will contain all of that information, but as a precaution, you can download these as well.
In a separate area on the same backup downloads page, customers can secure a compressed backup of every MySQL database individually. Each database should be downloaded in its compressed format. These will be uploaded to the new server to create matching database names at a later time.
Do Not Decompress!
During this process, do not decompress any of the downloaded backup files. This is because this process will be completed by the new server when the file is uploaded by the customer.
For Mac OS X users, ensure that Safari is not set to automatically open so-called “safe” file extensions after download. Doing so will ensure that the file remains uncompressed and ready for quick restoration. When all of the compressed backup files are secured, log out of the old host cPanel installation and head over to the new host’s version of the website administration software.
3. Making the Transfer
Begin uploading the compressed backup files to the new server.
Virtually every web hosting company will, after receiving the first month’s fee, send an email to the customer containing information like the domain name servers and IP address details for the new hosting plan. This IP address can be used to view the website’s content before DNS propagation and to access the individual FTP account and cPanel administration interface before changes are made.
Logging in
Find the email sent by the hosting company and look for the relevant IP address. If a cPanel link has not been specifically included, assume that either “/cpanel”, or the “:2082” port suffix can be added to that IP address to enable an administrative login.
Upon logging in to the new server’s cPanel iteration, locate the backup tools mentioned in Step 2, then navigate to the Backup Downloads page. At the page, locate the file-upload box associated with the full-site backup. This will often be labeled as a “Backup Restore” feature. Select the full-site backup file that was downloaded from the old web hosting company to begin the upload process.
After the file is completely uploaded, the webpage will refresh, and file-specific details will be displayed on a line-by-line basis as each file is moved into place. When this second page stops loading, the process will be complete.
Locate the browser’s “back” button to return to the previous page, and begin the database restoration process in pretty much the same fashion. When all of the information is transferred, it’s time to adjust some settings and begin the actual seamless transition process behind the scenes.

4. Ensure the Database Is Working
One thing to note is that the database backup files do not contain information about usernames, passwords, and permissions associated with each MySQL database. This information will need to be entered into the MySQL database interface within the cPanel.
Prefix Matter
In addition, you should note the prefix assigned to each database within the cPanel. If there are discrepancies, (e.g. “jsmith_wordpress” vs “jsm_wordpress”), the prefixes will need to be changed in the configuration file of each software application which connects to that database.
All Relevant Info
Add all of the relevant users, passwords, and permissions, and then make any necessary edits to system files by logging into the FTP account via the website’s IP address. This will ensure smooth operation of the software once the domain name has been transferred to show the new host’s files, instead of those located at the old company. Once that is done, everything is in place and ready to function perfectly.
All that needs to be changed now is the information that tells the domain which of the two hosting accounts’ files to display to the end user.
5. Switching Nameservers
Tell the domain registrar to use new domain name servers.
The final step of the process is to simply tell the domain name to show files and data on a different server than the one that’s currently in use. This is done by logging into the domain registration control panel provided by the domain registrar.
In this control panel, a heading or sidebar item named “Domain Name Servers” should show up, and the current information placed into that area should look like this:
1
2
NS1.OLD-WEBHOST.COM
NS2.OLD-WEBHOST.COM
These need to be replaced with the new name servers for the new host. If you are unable to find this information, navigate to the host’s support section, browse their documentation, or get in touch with a representative who can provide the server details.
Changes to DNS records will take effect within 12 to 24 hours in most cases, although sometimes it can take as little as six hours. During this time, both the new and old websites will function properly, and customers will see identical content no matter which hosting files are presented.
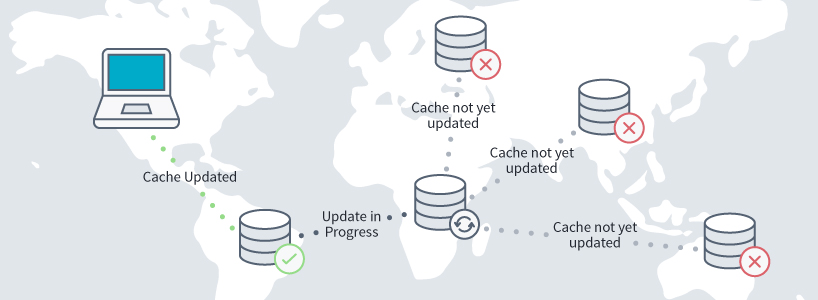
Wait for Nameserver Propagation
Posting content before propagation is complete may result in lost content or data after the new host files have become active. While downtime won’t be an issue, website owners should refrain from making any changes to a site’s design, files, or content, until they’re 100% sure that the process is complete, and that they’re accessing the new host server.
When this happens, the process of seamlessly transferring a website to a new web hosting provider is officially complete, and users will have survived the transition without experiencing any downtime whatsoever.
Tying it all up
Make sure to test the website and check that all features are working properly, then you can cancel the old hosting plan. And that’s all there is to it!
Have you ever migrated your website to another server? How long did the process take?
