
This tutorial will show you how to install iRedMail Email Server on a Linux server running Ubuntu 20.04|18.04. iRedMail is a robust, open source, and simple to deploy and administer mail solution for Linux, FreeBSD, and OpenBSD. System administrators may establish and manage mailboxes, users, and domains using a simple web interface included with iRedMail.
iRedMail Server Features
The following are the features of iRedMail server:
- Top Security: TLS is used to access POP3, IMAP, and SMTP services, and all mail services are accessible over secured connections. HTTPS is used to access web portals. If feasible, emails are encrypted in transit using TLS.
- Fully Open Source: All iRedMail components are created using open source software. Red Hat Enterprise Linux, CentOS, Debian, Ubuntu, FreeBSD, and OpenBSD have all been certified to run it.
- SpamAssassin, ClamAV, SPF, DKIM, greylisting, whitelisting, and blacklisting are examples of antispam and antivirus software. Spam was discovered and quarantined into a SQL database for future investigation.
- Support for mail accounts in OpenLDAP, MySQL, MariaDB, and PostgreSQL backend stores. Choose what appeals to you.
- Webmail access: A user-friendly online interface (Roundcube webmail or/and SOGo groupware) is offered for viewing and managing emails, folders, and sieve filters.
- You have the ability to establish as many mail accounts (domains, users, mailing lists, and administrators) as you desire.
- Web Admin Panel: If you are an admin user, you will have access to a web admin panel where you can manage your email accounts.
Benefits of iRedMail Server
Here are the advantages of using iRedMail server:
- Most Linux distributions are compatible with iRedMail, making it extremely accessible. It’s compatible with Ubuntu, Red Hat, CentOS, Debian, Free BSD, and Open BSD.
- It has calendar (CalDAV) and contact (CardDAV) services right out of the box.
- It is simple to set up, uncomplicated, and does not require specialist maintenance.
- There are no setup expenses for a fully equipped mail server, save for the ECS charges, unless you want the corporate edition.
- Mail limitations have been integrated into the system.
- Throttling for the sender and recipient is integrated.
- Security measures such as anti-spam and anti-malware are included.
- Webmail’s mail management features, such as AJAX, vacations, filters, and address books, are pre-installed.
- In a repeatable server setup, you may simply transfer or store a duplicate of your deployed instance.
- Because all data is under your control, having your own mail server is extremely beneficial for privacy.
- On your server, you may establish an almost infinite number of email accounts.
- You have the option of selecting one of four distinct backends (OpenLDAP, MySQL, MariaDB, and PostgreSQL).
Install and Configure iRedMail Server on Ubuntu 20.04|18.04
Before we can install iRedMail Server on Ubuntu 20.04|18.04, we’ll need the following items:
- Ubuntu 20.04 | 18.04 (Fresh Install) Linux
- A minimum of 2 GB of RAM is required. Add additional RAM – 4 GB+ – if you want to use it in a production setting with numerous domains and user accounts.
- Ensure that no other user/group is using 3 UID/GID: In the years 2000, 2001, and 2002,
- Domain name of the mail server
- A sudo user account is a user account that has been added to the sudo group or has root access.
The steps below will show you how to install iRedMail Server on Ubuntu 20.04 | 18.04.
Step 1: Update the System
Make sure you’re running the most recent version of the operating system on your computer.
sudo apt -y update
sudo apt -y upgrade
Reboot the system after update.
sudo systemctl rebootStep 2: Set the Server Hostname
Set the server hostname to a subdomain name in your DNS server’s configuration.
export HOSTNAME="mail.hirebestengineers.com"
sudo hostnamectl set-hostname $HOSTNAME --static
sudo hostnamectl set-hostname $HOSTNAME --transient
In the /etc/hosts file, enter the IP address and DNS name mapping.
$ sudo vim /etc/hosts
188.40.225.2 mail.hirebestengineers.com
Install the dns-utils package first to ensure DNS resolution.
sudo apt -y install dnsutilsThen, for local resolution, use the host command.
$ host mail.hirebestengineers.com
mail.hirebestengineers.com has address 188.40.225.2
mail.hirebestengineers.com mail is handled by 0 mail.hirebestengineers.com.
Use the dig command to look up a record in a DNS server.
$ dig A mail.hirebestengineers.com

; <<>> DiG 9.16.1-Ubuntu <<>> A mail.hirebestengineers.com
;; global options: +cmd
;; Got answer:
;; ->>HEADER<<- opcode: QUERY, status: NOERROR, id: 22986
;; flags: qr rd ra; QUERY: 1, ANSWER: 1, AUTHORITY: 0, ADDITIONAL: 1

;; OPT PSEUDOSECTION:
; EDNS: version: 0, flags:; udp: 65494
;; QUESTION SECTION:
;mail.hirebestengineers.com.	IN	A

;; ANSWER SECTION:
mail.hirebestengineers.com. 0	IN	A	188.40.225.2

;; Query time: 0 msec
;; SERVER: 127.0.0.53#53(127.0.0.53)
;; WHEN: Sat Sep 11 12:24:16 UTC 2021
;; MSG SIZE  rcvd: 71
Step 3: Download the latest release of iRedMail Server
First install wget command to download iRedMail server.
sudo apt -y install wgetDownload iRedMail server.
wget https://github.com/iredmail/iRedMail/archive/1.5.2.tar.gzExtract the archive file you just downloaded.
tar xvf 1.5.2.tar.gzStep 4: Install iRedMail Server on Ubuntu 20.04 | 18.04
iRedMail Mail Server may be installed automatically on Ubuntu 20.04 | 18.04 using an installer script. Switch to the newly formed folder as the working directory.
cd iRedMail-*/Start the installation of iRedMail server.
#make the script executable
sudo chmod +x iRedMail.sh

#run the installer script
sudo ./iRedMail.sh
The installation script will install the necessary prerequisites before asking you a few basic questions to get your iRedMail server up and running on your Ubuntu 20.04 | 18.04 Linux system.
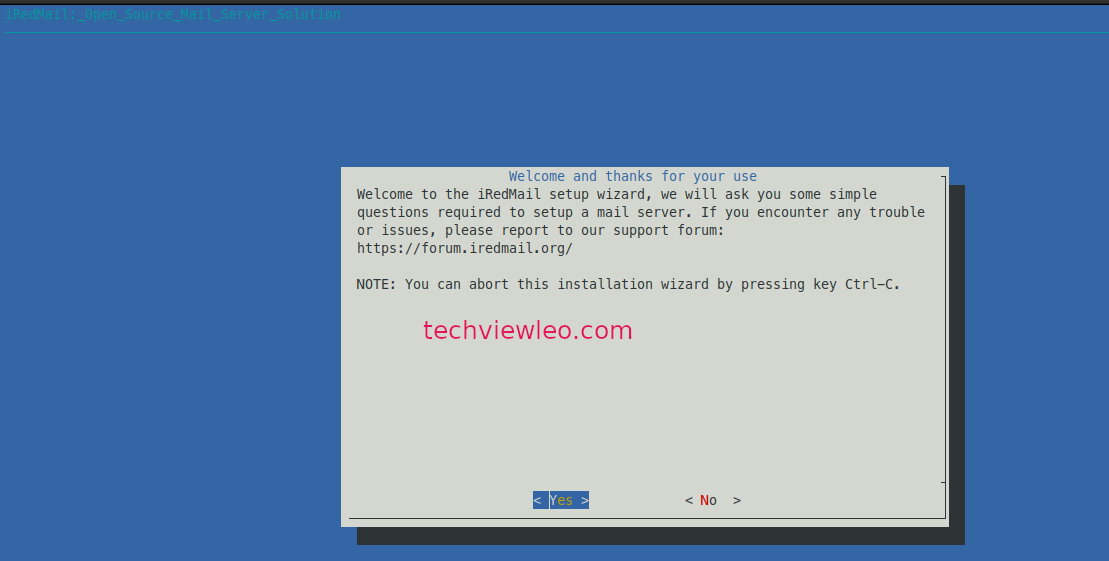
Accept the wizard’s installation instructions
The first screen asks you if you want to install iRedMail on Ubuntu 20.04 | 18.04 or not.
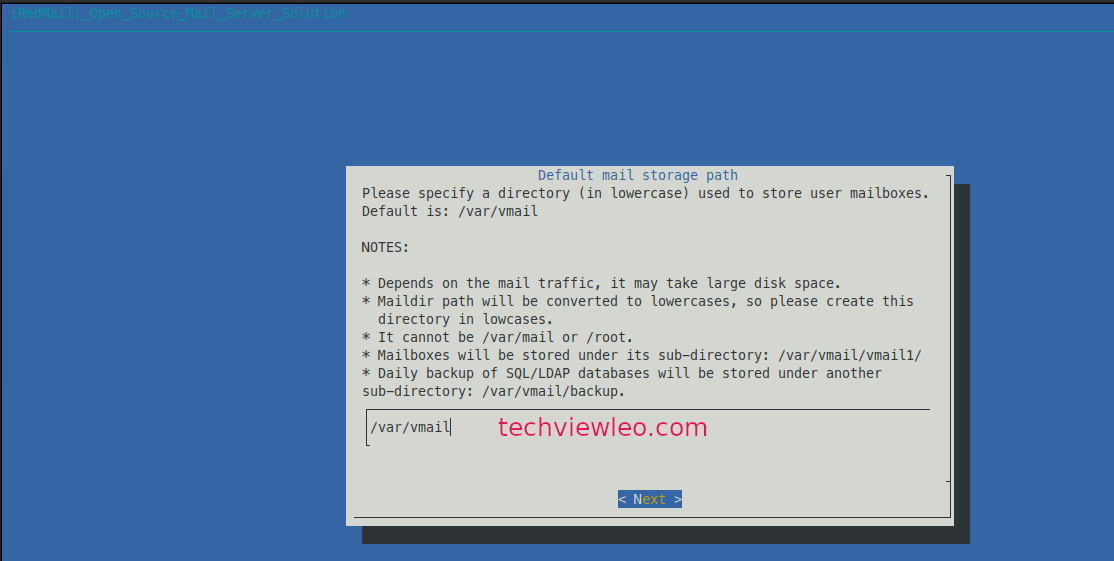
Specify the location where mailboxes will be stored
Before changing the default mailboxes storage directory, make sure you read the NOTES.
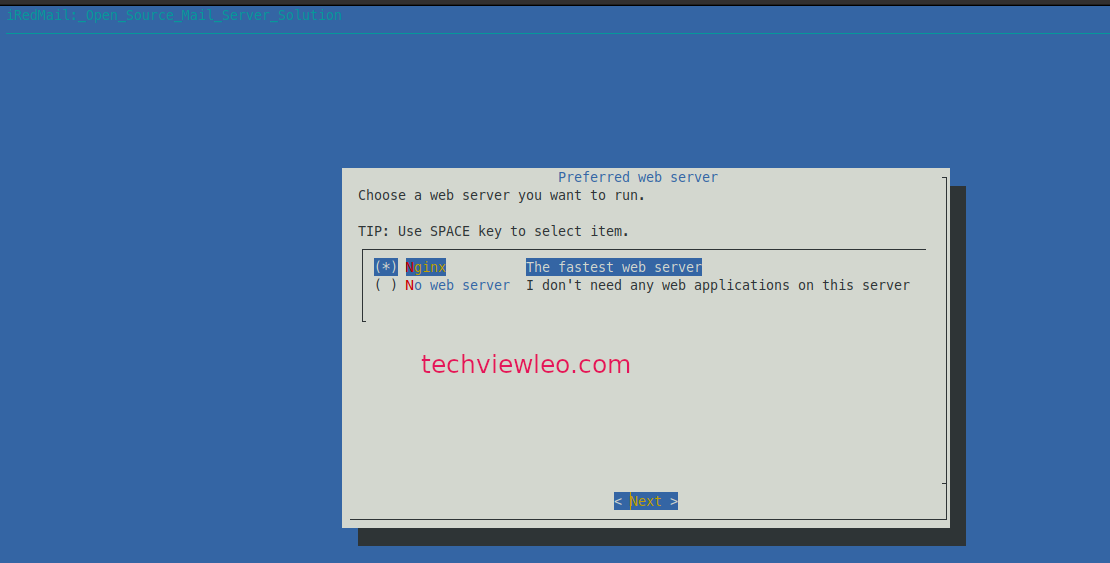
Select a web server to use
Use nginx’s default configuration.
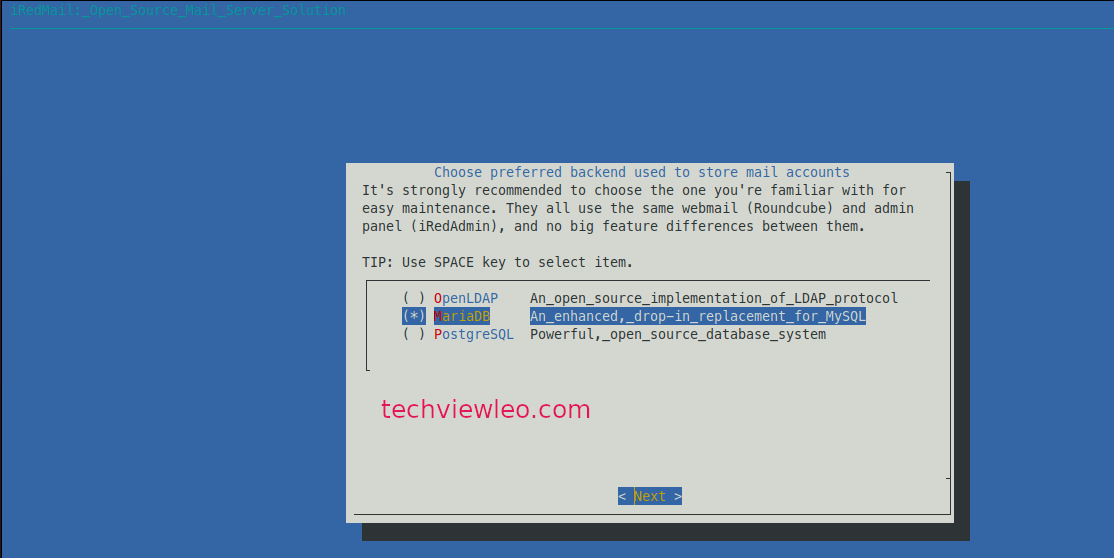
Select the backend that will be used to store your email account
For easier management and maintenance after installation, choose the one you’re most comfortable with. I’m going to use MariaDB.
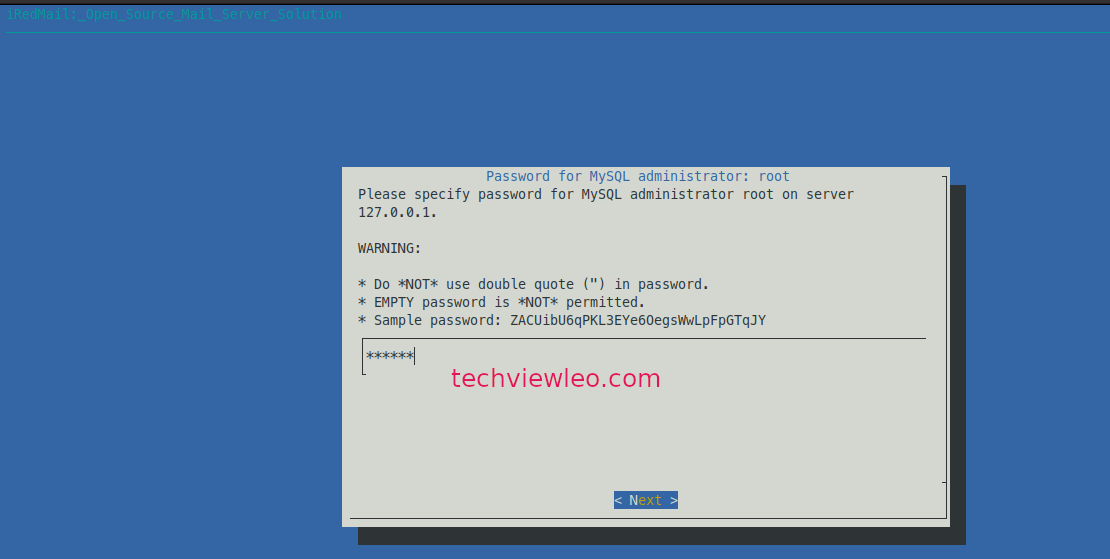
Create a root password for MySQL
Provide the MySQL root user’s password.
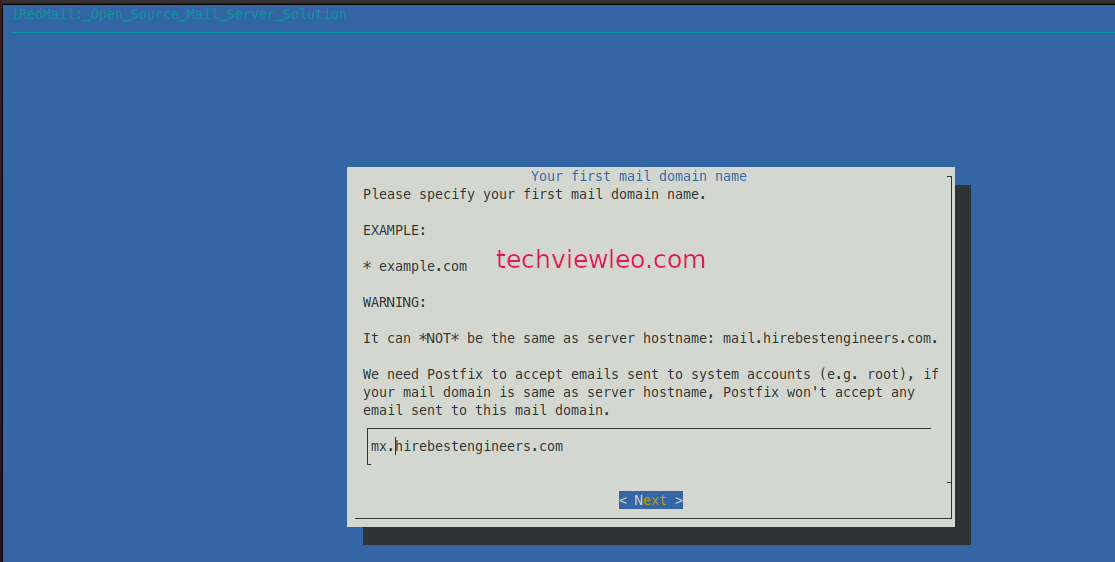
Fill in the initial domain name for your email
Provide your Mail domain name – it must be different from your server name.
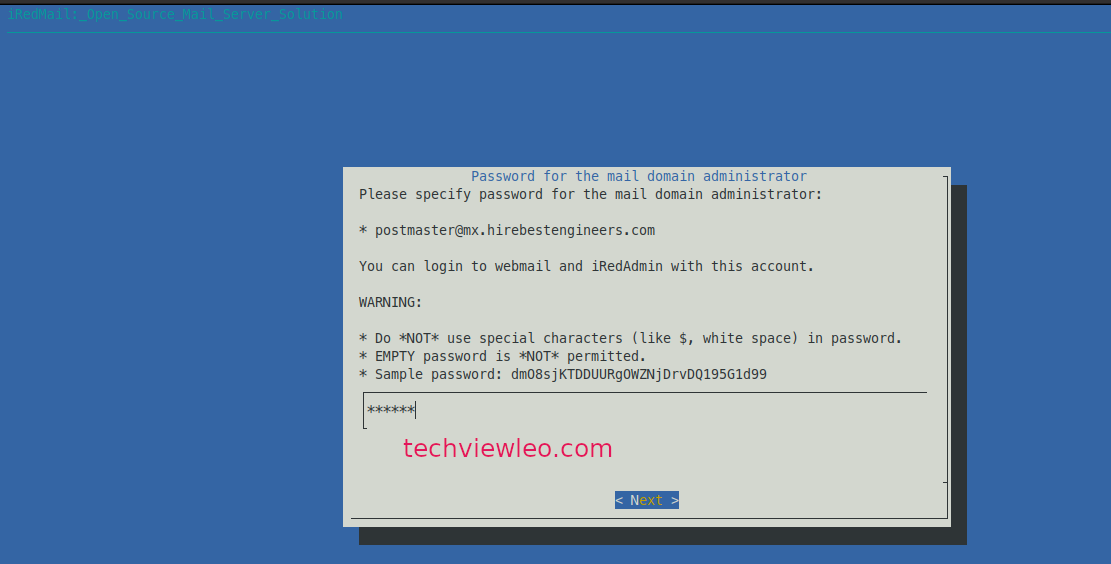
Set a password for the administrator of the Mail domain
Fill in the password for the mail domain administrator and select the features you want to activate.
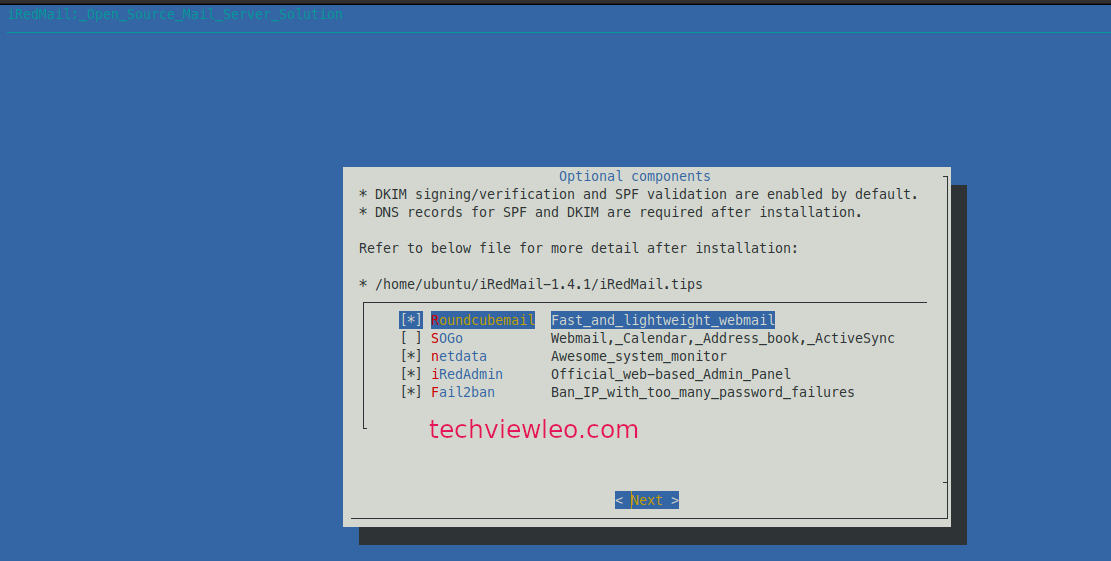
Optional components
You can choose some of the optional components for installation in the following window.
Review the settings supplied and begin the installation process.
*************************************************************************
***************************** WARNING ***********************************
*************************************************************************
*                                                                       *
* Below file contains sensitive infomation (username/password), please  *
* do remember to *MOVE* it to a safe place after installation.          *
*                                                                       *
*   * /home/ubuntu/iRedMail-1.5.2/config
*                                                                       *
*************************************************************************
********************** Review your settings *****************************
*************************************************************************

* Storage base directory:               /var/vmail
* Mailboxes:
* Daily backup of SQL/LDAP databases:
* Store mail accounts in:               MariaDB
* Web server:                           Nginx
* First mail domain name:               mx.hirebestengineers.com
* Mail domain admin:                    postmaster@mx.hirebestengineers.com
* Additional components:                Roundcubemail netdata iRedAdmin Fail2ban

< Question > Continue? [y|N]y
To begin installation, type y or Y and press Enter. The script will automatically install and setup all of the needed packages.
You have the option of enabling the iRedMail firewall.
*************************************************************************
* iRedMail-1.5.2 installation and configuration complete.
*************************************************************************

< Question > Would you like to use firewall rules provided by iRedMail?
< Question > File: /etc/nftables.conf, with SSHD ports: 22. [Y|n]y
[ INFO ] Copy firewall sample rules.
< Question > Restart firewall now (with ssh ports: 22)? [y|N]y
[ INFO ] Restarting firewall ...
[ INFO ] Updating ClamAV database (freshclam), please wait ...
********************************************************************
To activate mail services, restart your server.
sudo systemctl rebootStep 5: iRedMail Server Access Credentials
If the script was run as root user, your iRedMail Server information and Access credentials are stored in the file “/root/iRedMail-1.5.2/config”; if the script was ran as a normal user, they are stored in the file “/home/$USER/iRedMail-1.5.2/config”.
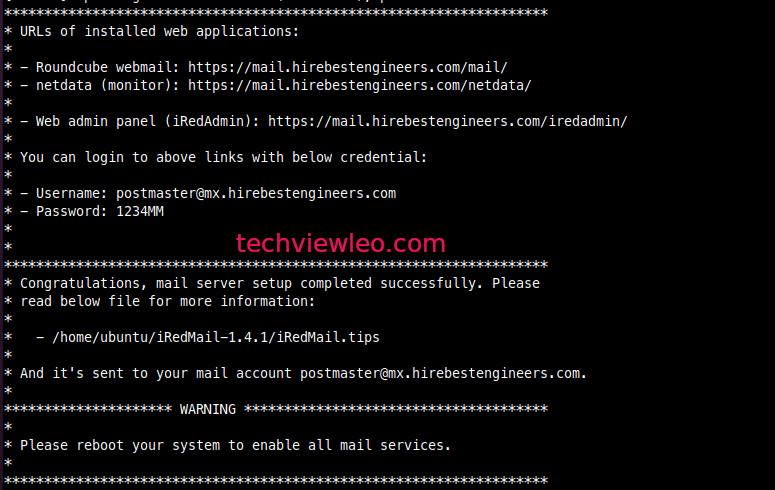
Following iRedMail’s successful installation on Ubuntu 20.04 | 18.04, the URLs of installed web apps are displayed.
- Roundcube webmail: https://your_server/mail/
- SOGo Groupware: https://your_server/SOGo
- Web admin panel (iRedAdmin): httpS://your_server/iredadmin/
This is the output:
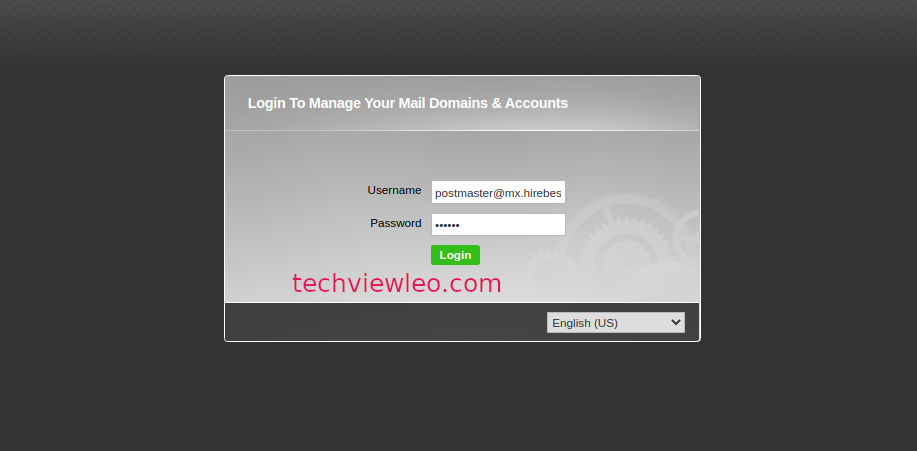
Using the credentials you saved, log in to the Admin.
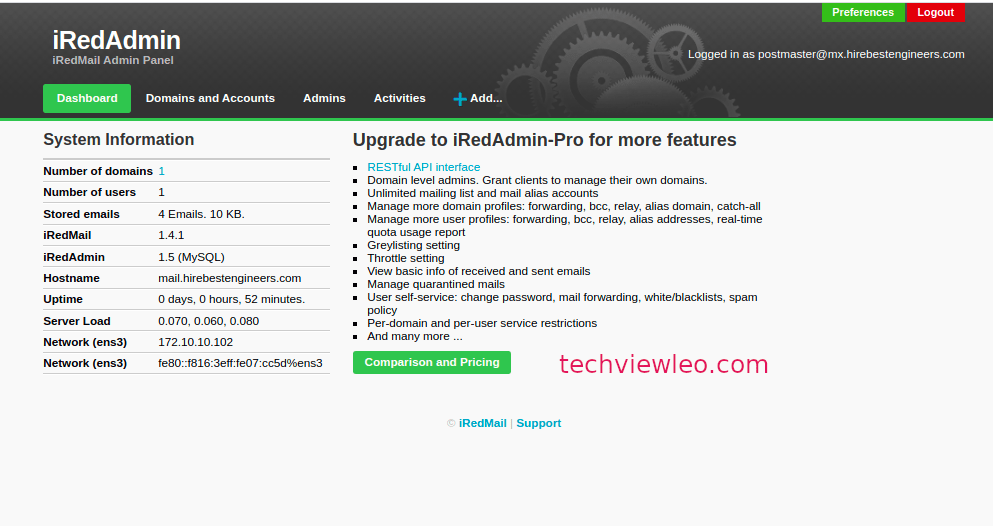
On first login, the iRedMail Admin panel looks like this:
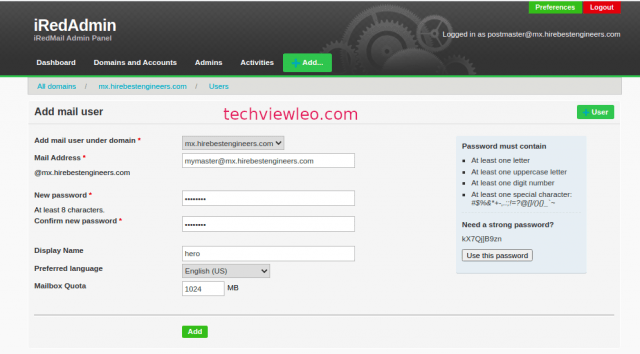
Adding user
To add User click on “+Add > User” and fill in the fields then click Add button at the bottom.
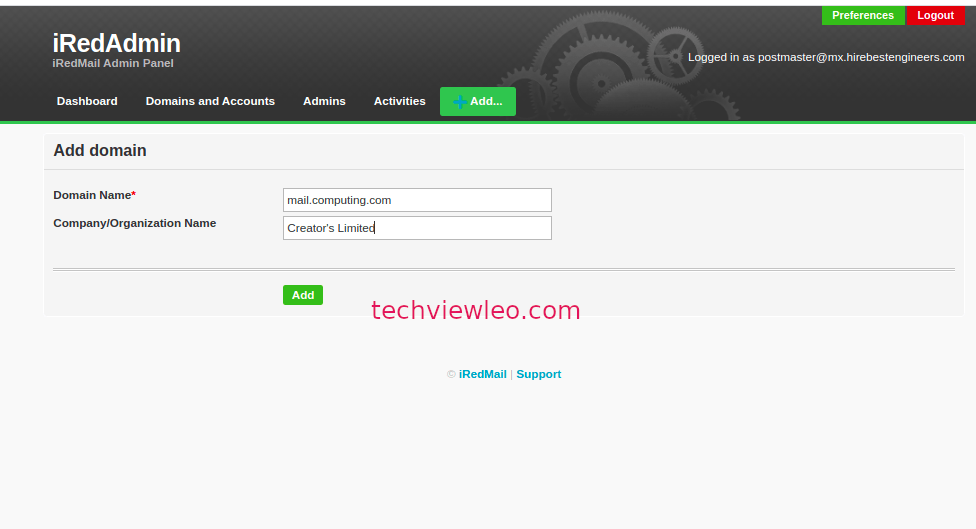
Adding Domain
To add Domain click on “+Add > Domain” and fill in the fields then click Add button at the bottom.
Access Mail Client on /mail:
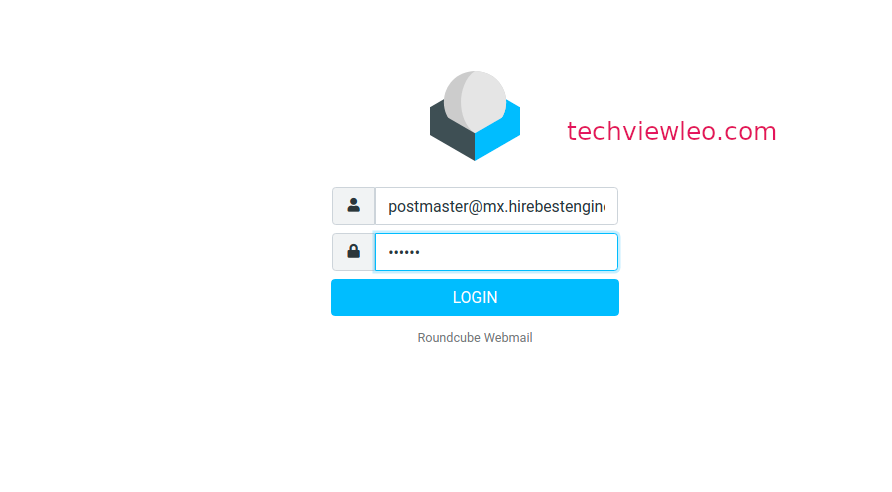
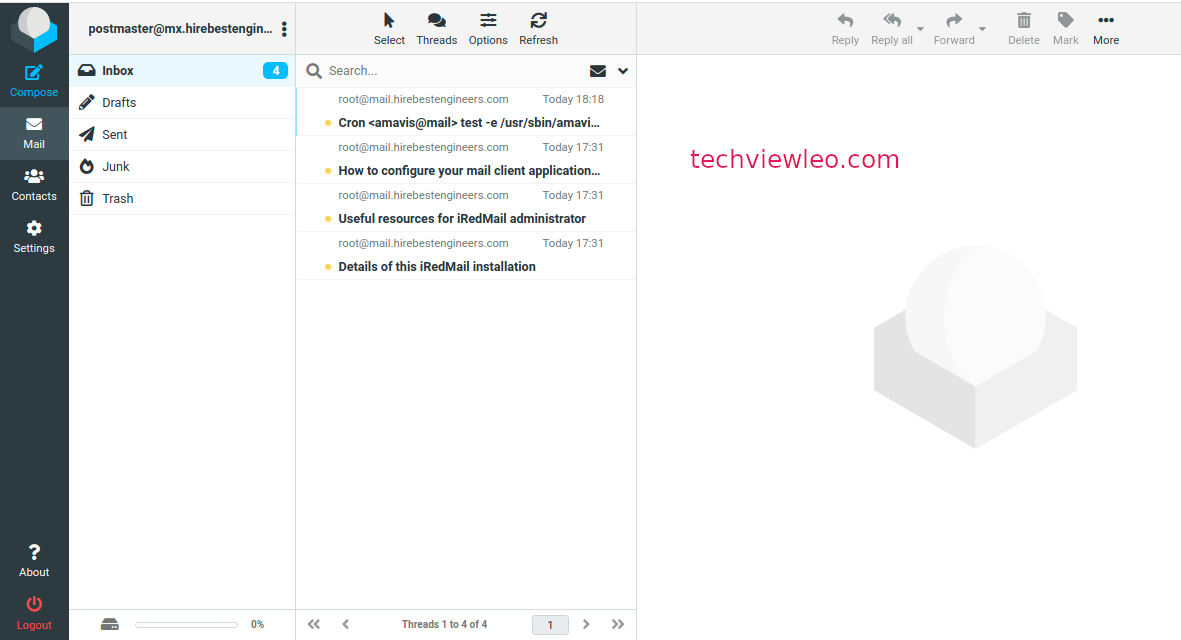
On first login, the iRedMail client panel looks like this:
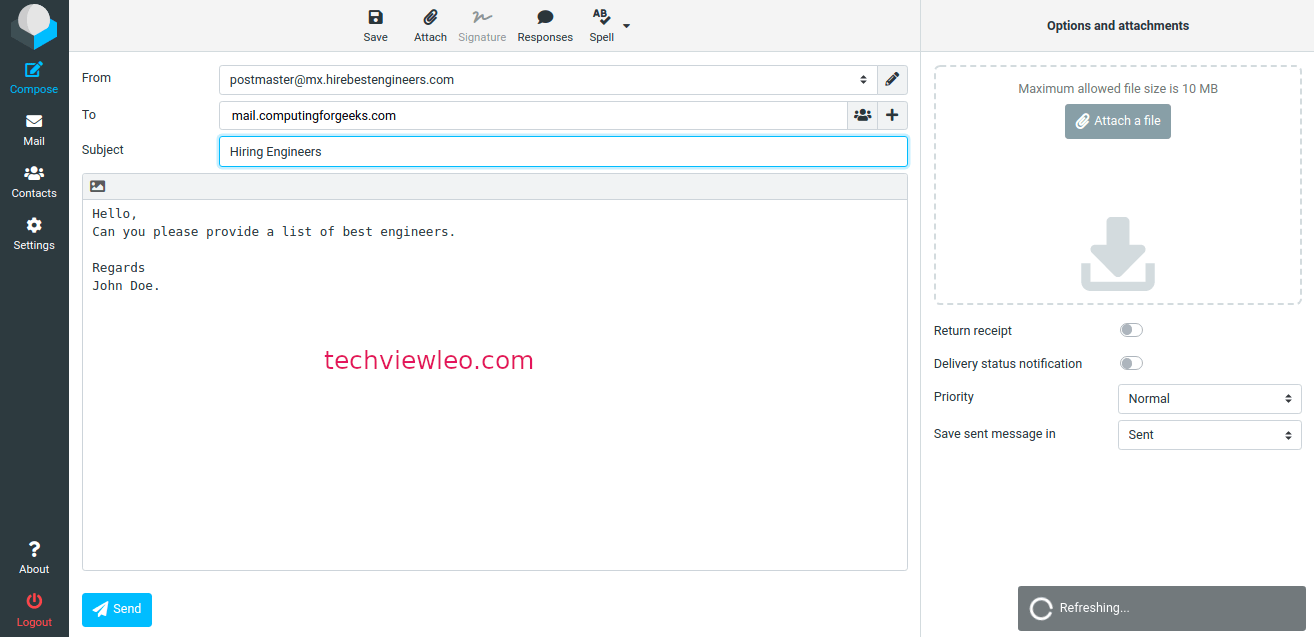
Send Mail
This is how to send mail on the client site. Compose your mail and click send button.
Conclusion
We learnt how to setup the iRedMail server on Ubuntu 20.04 | 18.04 in this article.
